Google reCAPTCHA V3: Enterprise key generation, config and implementation.
Some issues with my website’s contact form, a robot sent a series of spam emails, the regular V3 only protects the frontend submission, not direct attack from the backend.
So I have to update to the Enterprise version. I think so far works well and I recommended to update if you haven’t yet.
The process
All Google services have moved to under Google Cloud, so you have to use Google Cloud console to add, config, set up your reCAPTCHA key to frontend and backend.
If you are familiar with Google Cloud, I guess it’s not difficult. But if not, it’s hard to find where to start and where to look for, how to generate keys and others.
Especially the process instruction in the reCAPTCHA key generation page is not all you need to deal with like before. More than you think, more to read doc. more to understand their structure etc.. .
So please follow how I did.
Create a project
Anything you do there, first create a project. If you already done something and have a project, you can use the existing project but I recommend to create a new project for “G-reCAPTCHA”.
Where to start
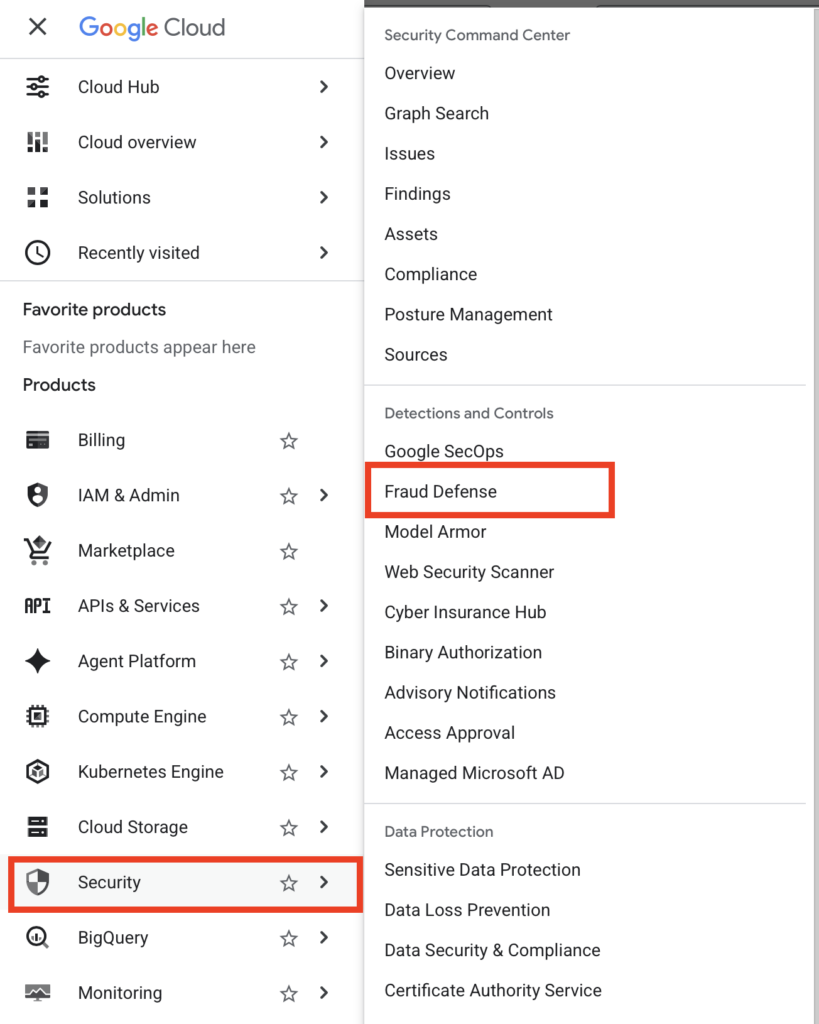
Google reCAPTCHA is located in the “SECURITY” section, under “Fraud Defense”. click that from the top left hamburger menu.
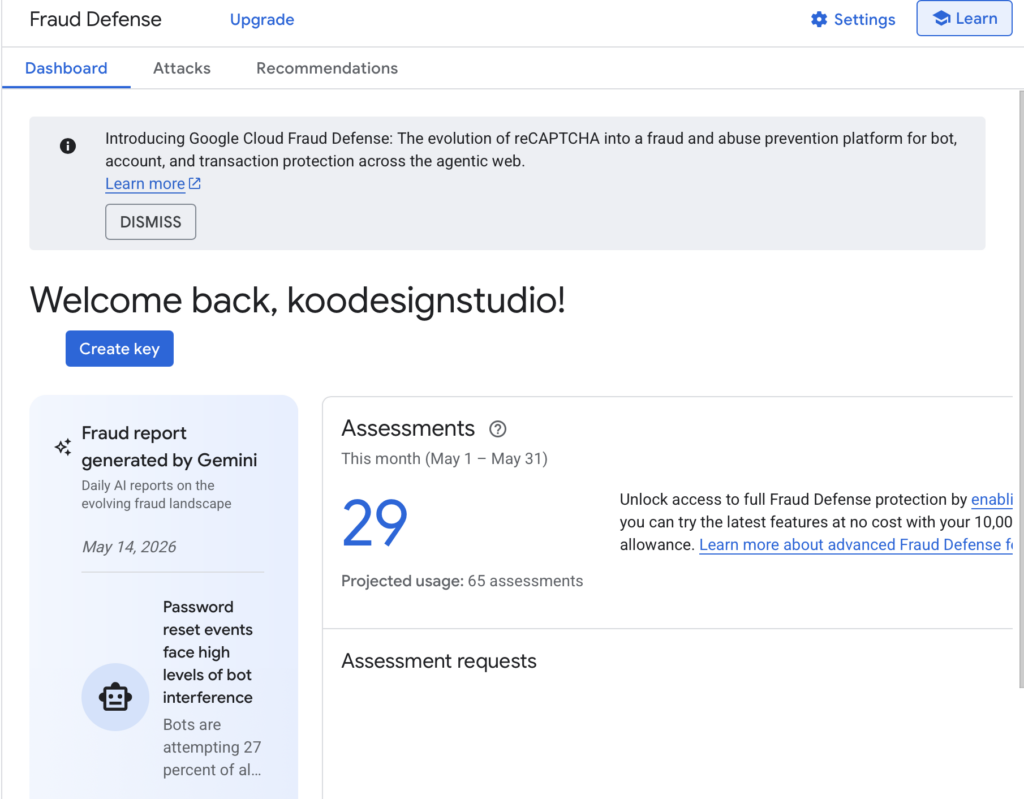
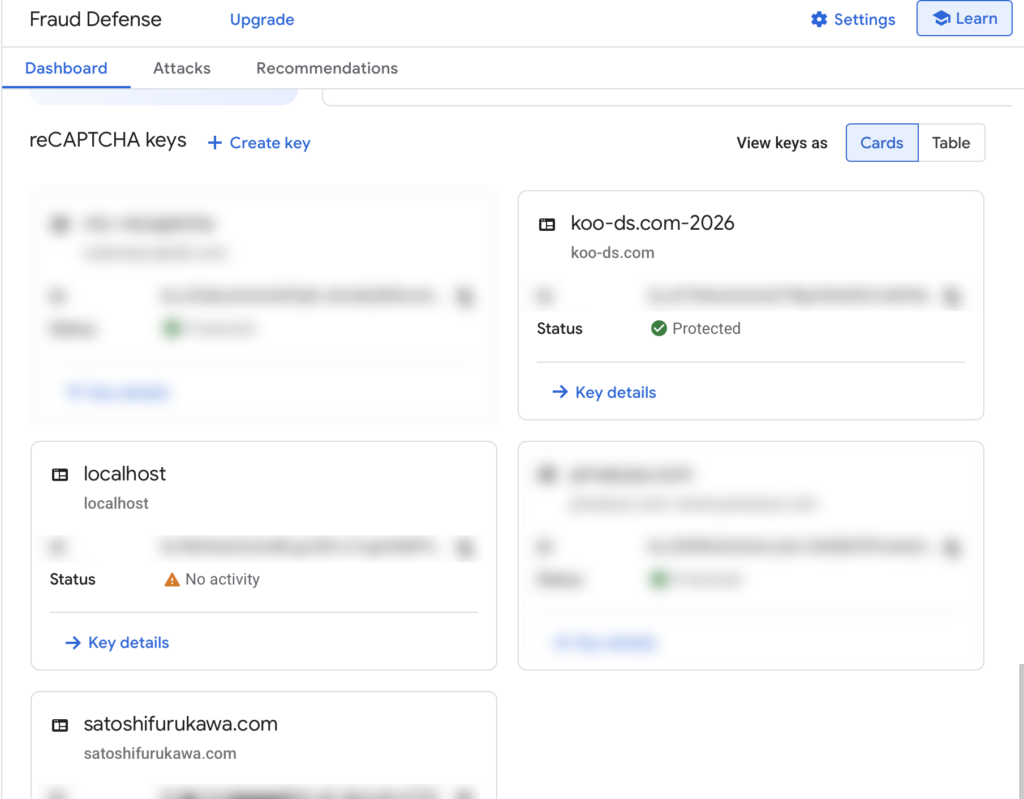
In the Dashboard, if you’ve used some “old” reCAPTCHA, you can find the keys there too in the list below.
I decide to start from creating a new key for my website.
NOTE: When you create a new key, it will automatically create a “Essential” plan. And t’s “Free up to 10,000 assessments/month”. It’s good for my kind of business since I don’t expect so many access. But if you run an eCommerce site, maybe consider to update. You can check and update the plans in the “Attacks” tab.
+ Create Key
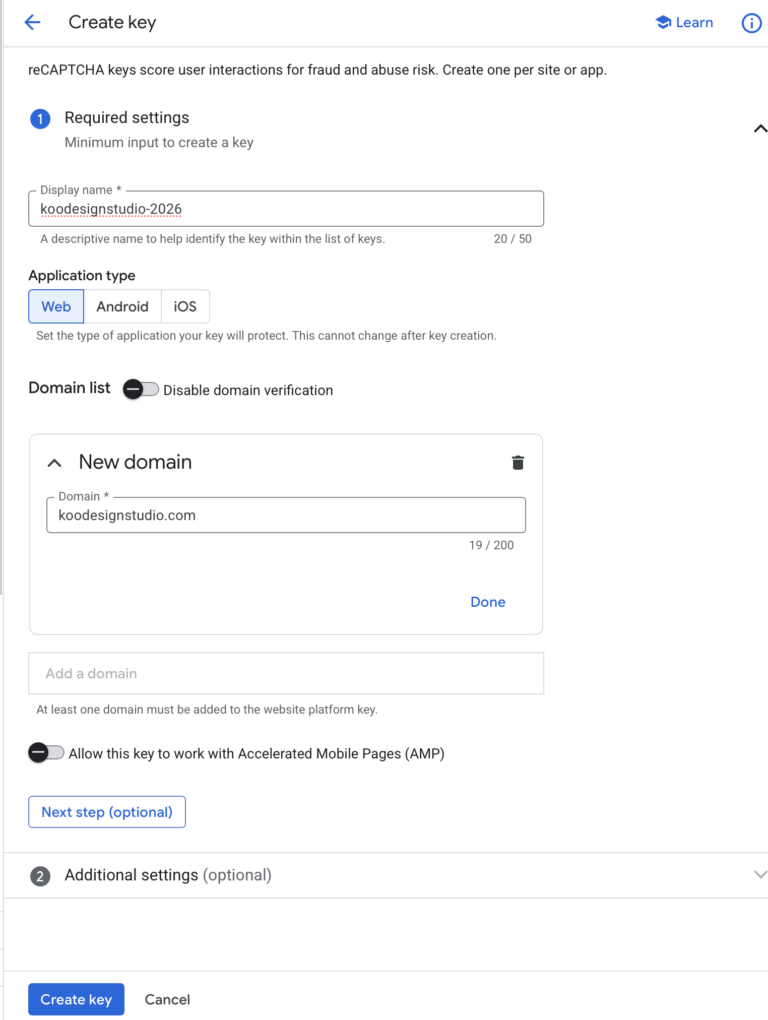
Click to + Create key.
Fill:
- [Display name (like a site name)],
- select Application type [Web|Android|iOS]
- and [Add domain](that’s the site to use the reCAPTCHA)
- then [Create Key]
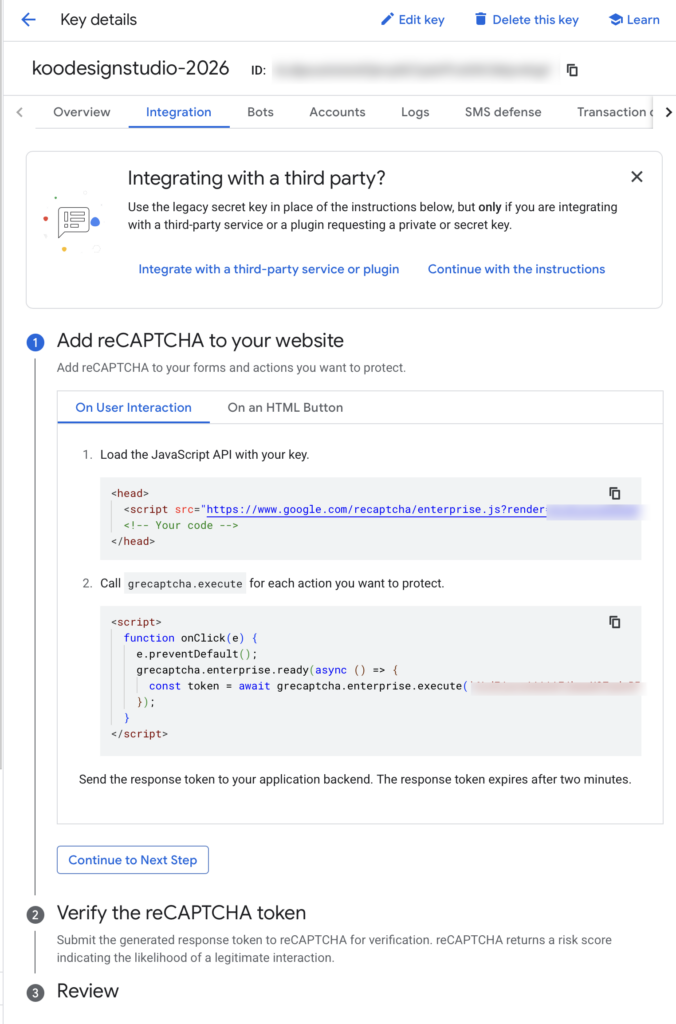
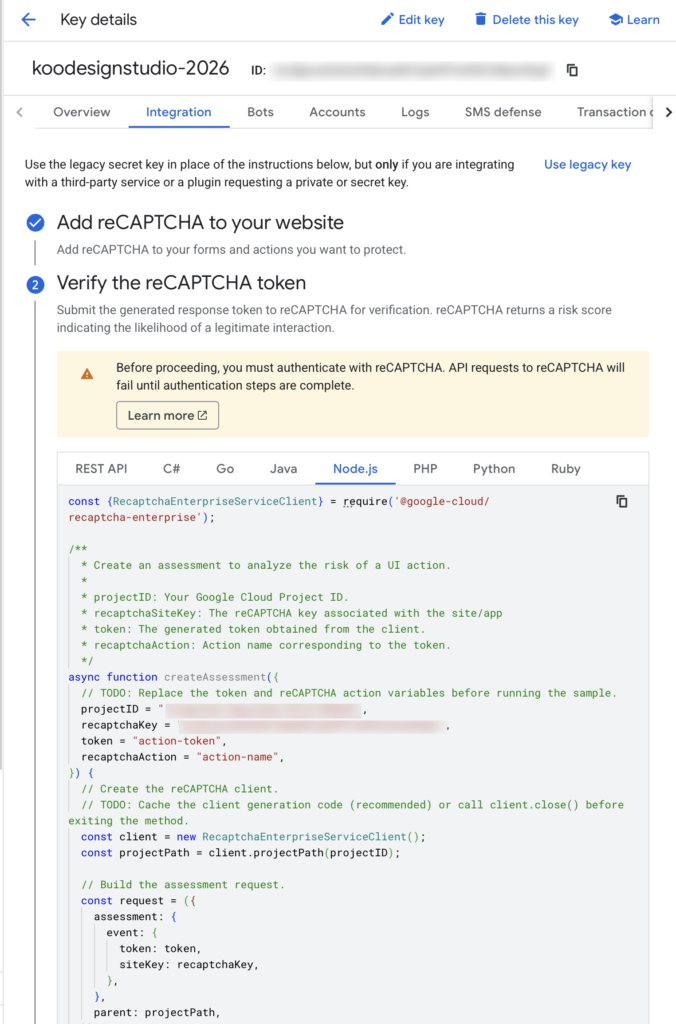
Follow the ① Frontend and ② Backend setups in the “Integration” tab
Easy!
NO!!!! It’s not that simple.
More steps are hidden.
But for now, you created a reCAPTCHA key successfully anyway.
Frontend
Following the “integration”
instruction.
At the top of your web site such as index.html, inside < head> </head> tag,
add the line:
This is simple.
Don’t forget to replace the Site KEY, in the line after:
enterprise.js?render=
<script>
src="https://www.google.com/recaptcha/enterprise.js?render=your-site-key">
</script>
Then, for the form submission, add:
<script>
function onClick(e) {
e.preventDefault();
grecaptcha.enterprise.ready(async () => {
const token = await grecaptcha.enterprise.execute('your-site-key (ID)', {action: 'LOGIN'});
});
}
</script>
My example here, vuejs composition-API
try {
const token = await new Promise((resolve, reject) => {
if (typeof grecaptcha === 'undefined' || !grecaptcha.enterprise) {
reject(new Error('reCAPTCHA library not loaded. Check if script is blocked.'));
return;
}
grecaptcha.enterprise.ready(function() {
grecaptcha.enterprise.execute('your-key', {
action: 'contact'
})
.then(resolve)
.catch(reject);
});
});
const payload = {
email: user.value.email,
name: user.value.name,
recaptchaToken: token
};
const response = await axios.post(variables.DBP, payload);
console.log('Success:', response.data);
initForm();
thankYou.value = true;
} catch (err) {
console.error('Submit error:', err);
alert(`Submission failed: ${err.message}`);
} finally {
loading.value = false;
}
};
e;
}
};
Backend - (tricky)
To adding code the backend server.
I use Node.js Express server.
actually it took me long…
It wasn’t clear, easy to find out this
Learn More
click [Learn More] to get how to “authenticate”, but it’s pretty complex, at least to me….
but Anyway, First you need to generate a json file for the backend.
Generate a json file for the backend
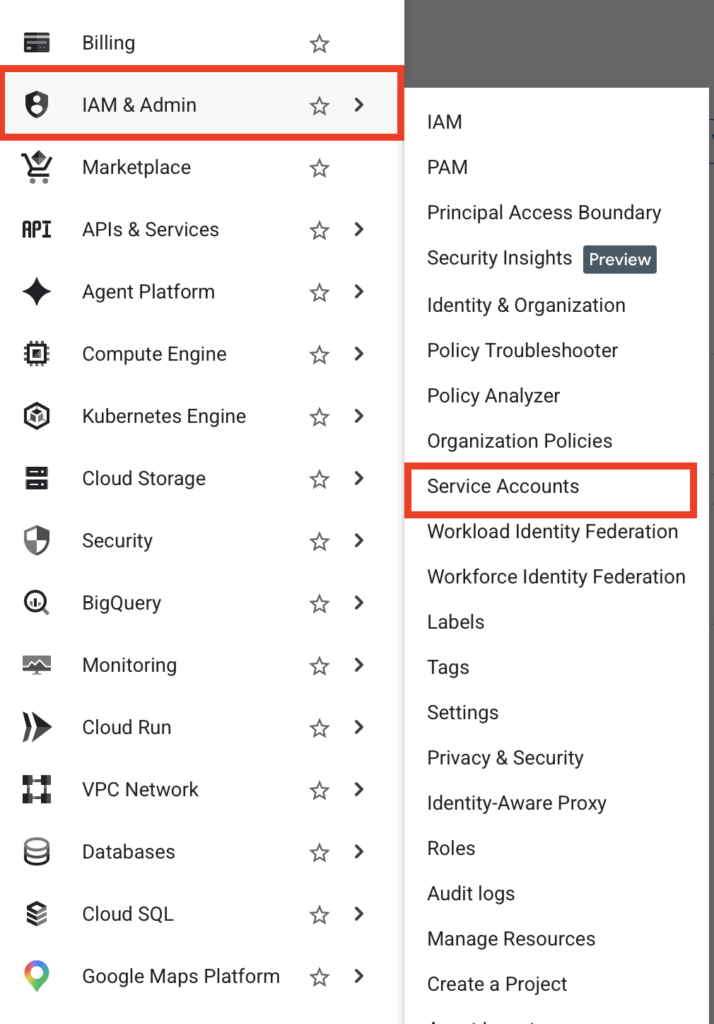
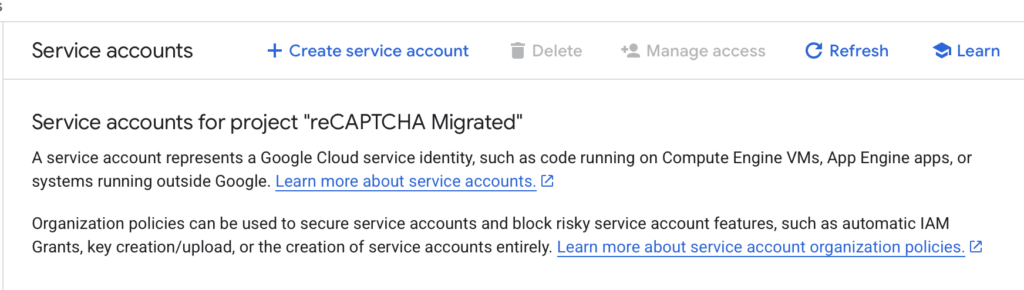
- go to the left top, hamburger menu [IAM & Admin > Service Accounts]
- on the top, click [+ Create]
- service account
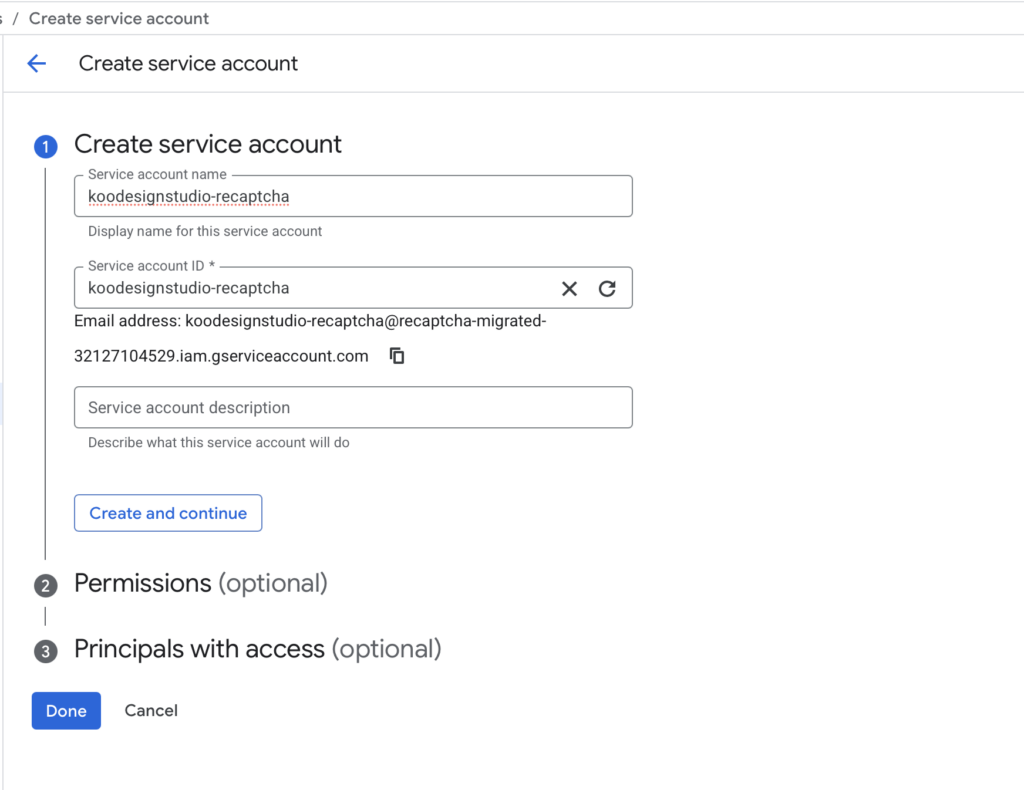
- Create service account
- service account
- name = recaptcha-service
- service account ID will automatically created
- sercice account description = google recaptcha
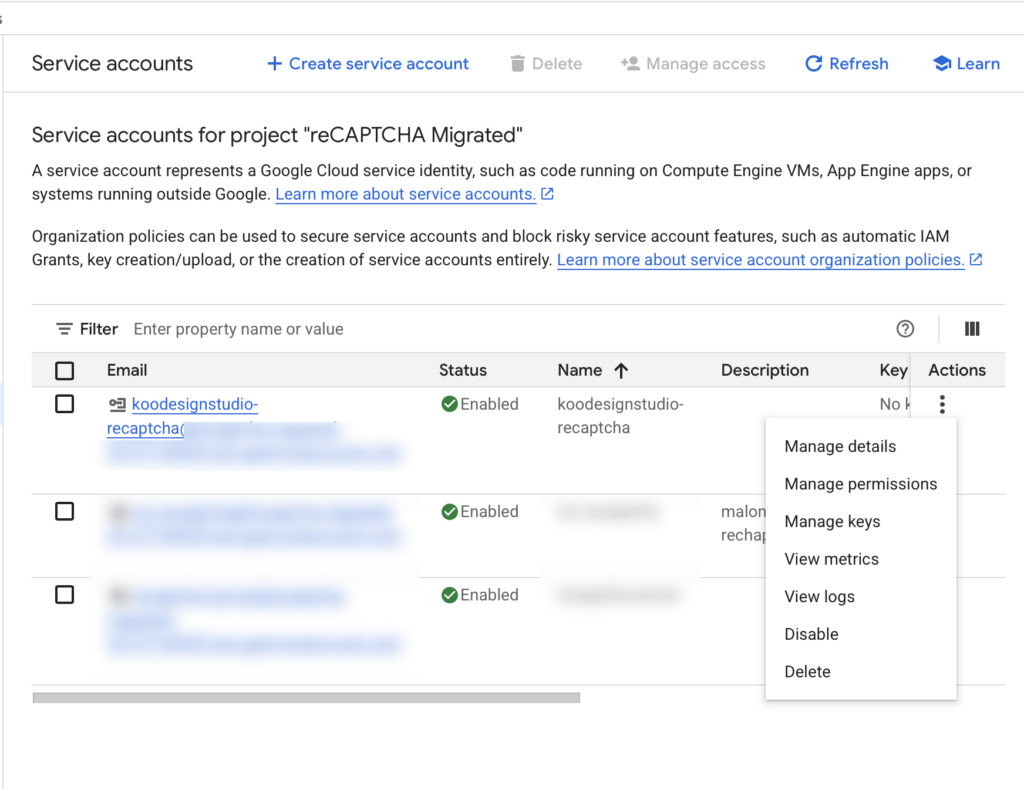
- Once created it, go to [Actions] (three vertical dots)
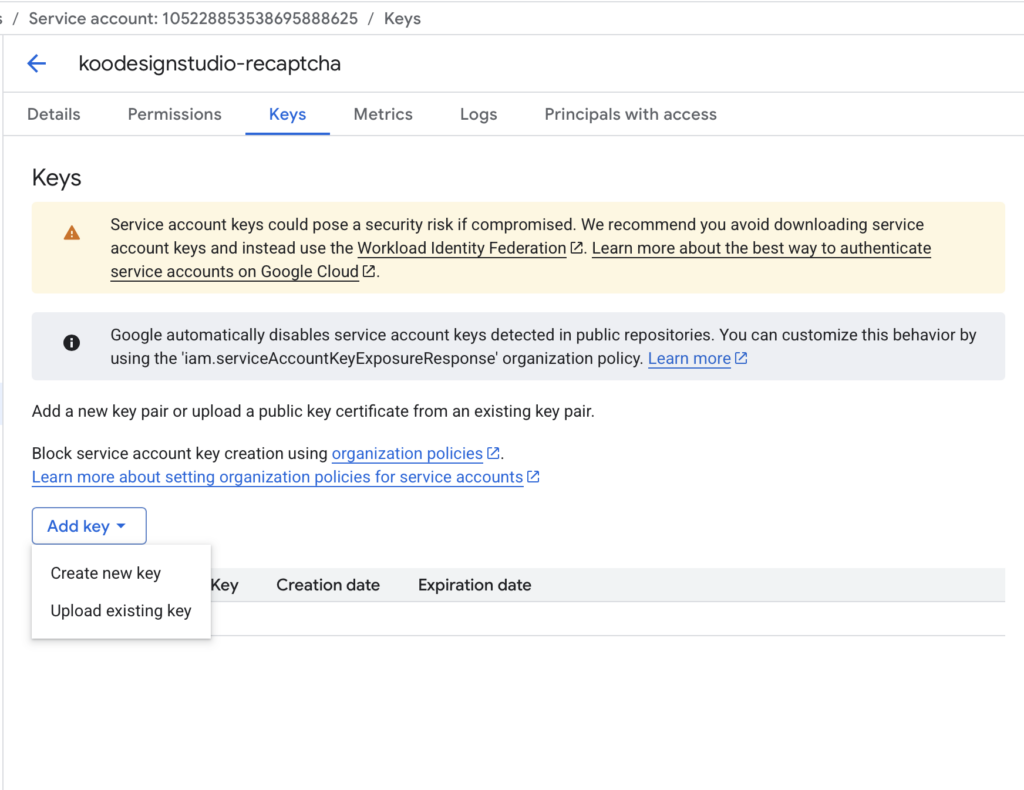
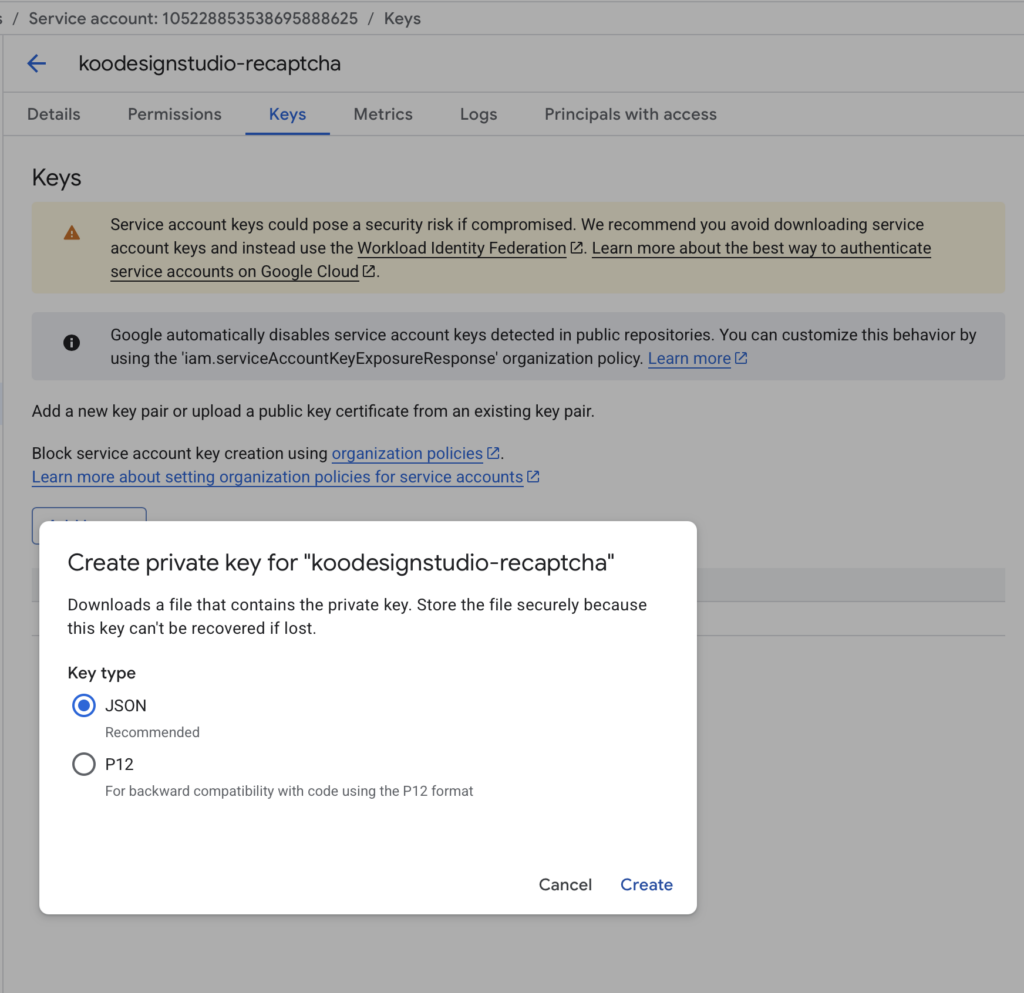
[Add key] > create new key > JSON
it will generate a key and download to your computer automatically. You can find the file something like “recpatcha26-xxxxx-xxxxx.json” in your download folder
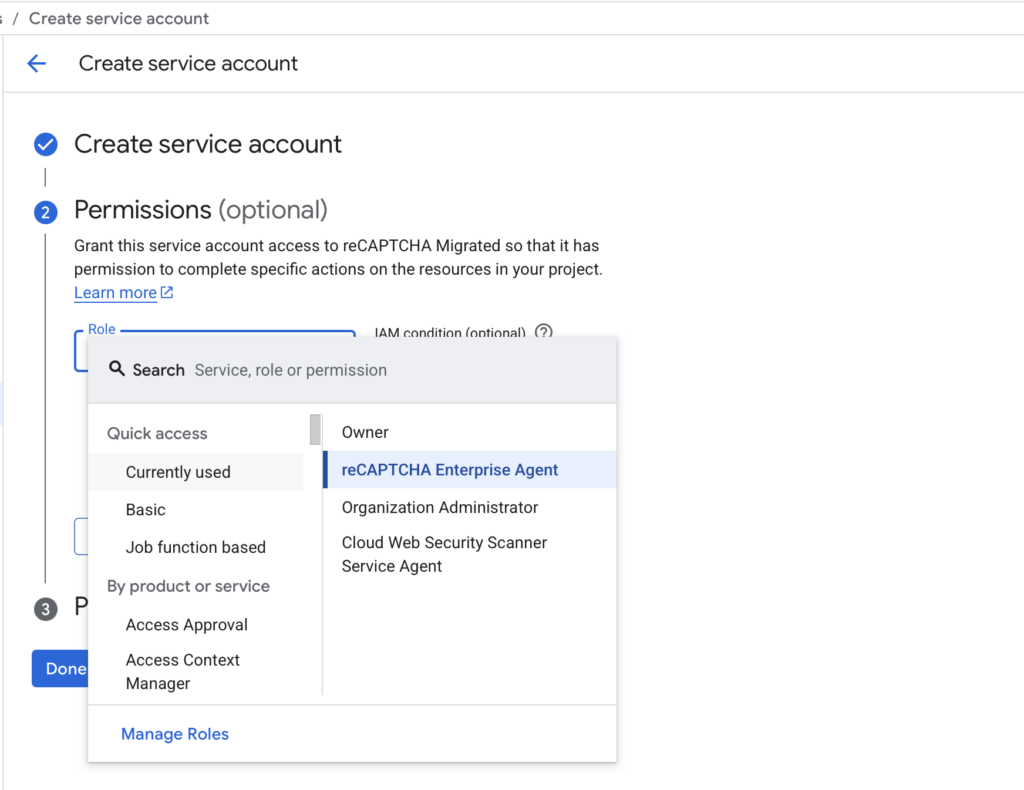
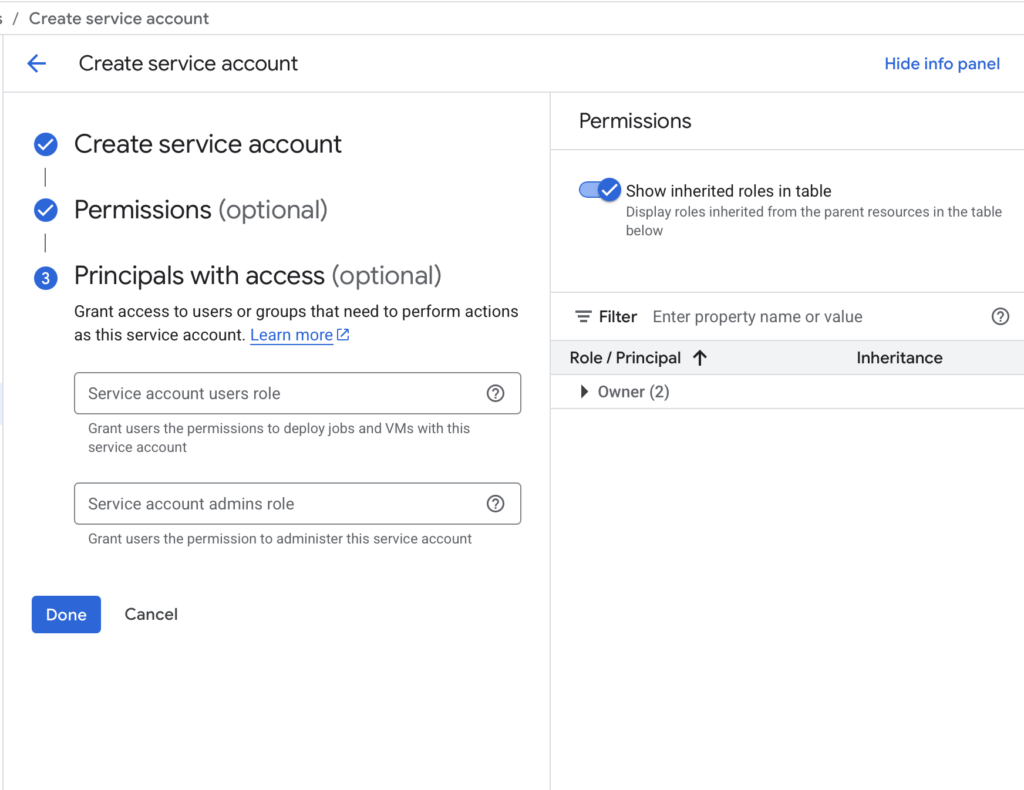
This process ② Permission (option) is important. Don’t forget to select “reCAPTCHA Enterprise Agent”
I didn’t first time because it says (option)… and when tested my server I got 500 error.
So it’s better to config when create a service account.
Once you’ve done creating the account, you can find in the list with newly created Email.
Select Manage Keys from Actions ⠇
Then [Add key] > [Create new ley]
Select JSON
Once you are successfully get and download the json file. Then upload it to the same directory where the server.js (node server app) located. (Actually you can place anywhere in the server although it’s easier to configure the path)
Configure the server script (Node.js)
After uploading the json file, yourProjectName-xxxxxxx-xxxxx.json
You need to install @google-cloud/recaptcha-enterprise package.
In your IPS cloud server where your express server (server.js) is, (mine is Linux Ubuntu) type:
and to configure the server.js adding lines below:
const {RecaptchaEnterpriseServiceClient} = require('@google-cloud/recaptcha-enterprise');
const recaptchaClient = new RecaptchaEnterpriseServiceClient({
keyFilename: "/path/To/your/projectName-xxxxx-xxxx.json"
});
My sample code for app.post:
app.post('/contact', async (req, res) => {
const token = req.body.recaptchaToken; // send this from the client
if (!token) {
return res.status(400).send
({ error: 'Missing recaptcha token' })
};
try {
const request = {
parent: `projects/${'yourProjectName'}`,
assessment: {
event: {
token,
siteKey: 'YourReCAPTCHAkey-same-as-theFrontend'
},
},
};
const [assessment] =
await recaptchaClient.createAssessment(request);
if (!assessment.tokenProperties || !assessment.tokenProperties.valid) {
return res.status(403).send({ error: 'Invalid reCAPTCHA token' });
}
const score = assessment.riskAnalysis?.score ?? 0;
if (score < 0.5) return res.status(403).send({ error: 'Low reCAPTCHA score', score });
const transporter = nodemailer.createTransport({
host: "smtp.yourMailService.com",
port: 587,
auth: {
user: "yourUserName",
pass: "YourPassword"
},
});
const mailOptions = {
from: 'info@koo-ds.com',
subject: `Message from ${req.body.email}`,
html: `
<h1>Message from ${req.body.name}</h1>
Email:${req.body.email}
`,
};
await transporter.sendMail(mailOptions);
return res.send({ message: 'Success' });
} catch (err) {
console.error('reCAPTCHA verification error:', err);
return res.status(500).send({ error: 'reCAPTCHA verification failed' });
}
});
Please refer https://koo-ds.com/contactHow for Node Express Server development.
TODO:
in console.cloud.googe.com
- Create a new project
- get reCAPTCHA key
- Add it to the frontend <head>
- configure your sending script
- back to google cloud to create Service Account and get .json file
- upload the json to the production server
- configure server.js adding lines for reCAPTCHA
- make sure the path to .json file is correct
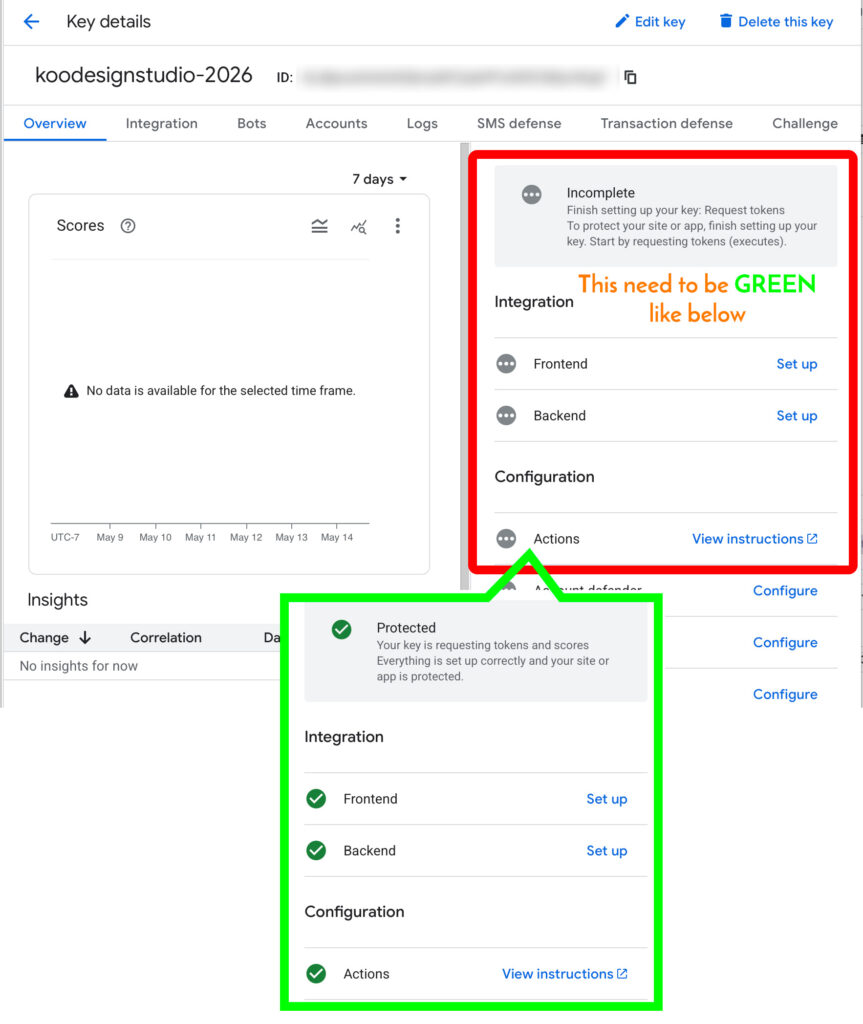
- test if now error, means you get inquire email from the site form. Back to Google Cloud to check the reCAPTCHA is “Protected”. Frontend and backend integrated.
Then you will see the activities.
GOOD LUCK!!