Adobe After Effeccts、Nuke, Fusion 等のSFX専用のソフトウェアが無くてもかっこいい効果をビデオに追加する事ができます。例えばデジタルスクラップブックを作る要領です。フッテージ映像の不要な部分をマスクで大まかに切り抜き、紙等のテキスチャーの上の置きます。そしてページを開くトランジッション効果を使ったりします。
from koo design studio newsletter – vol. 37(J) 04/06/2021
MAKING A VIDEO LIKE A PRO!
THIS IS 2ND OF THE SERIES ON MAKING A VIDEO LIKE A PRO
Some of you might think to make your product/service promotion video by yourself. It’s good idea and fun so let’s do it. In this blog, I’d like to shares some professional tips for you. I hope that will help you to understand the production process and you succeed in your video production.
This is a series of 4 process tips:
Planning (pre-production)
Shooting (production) [This issue]
Editing (post-production)
Analysis (publish to YouTube and analyze the viewer)
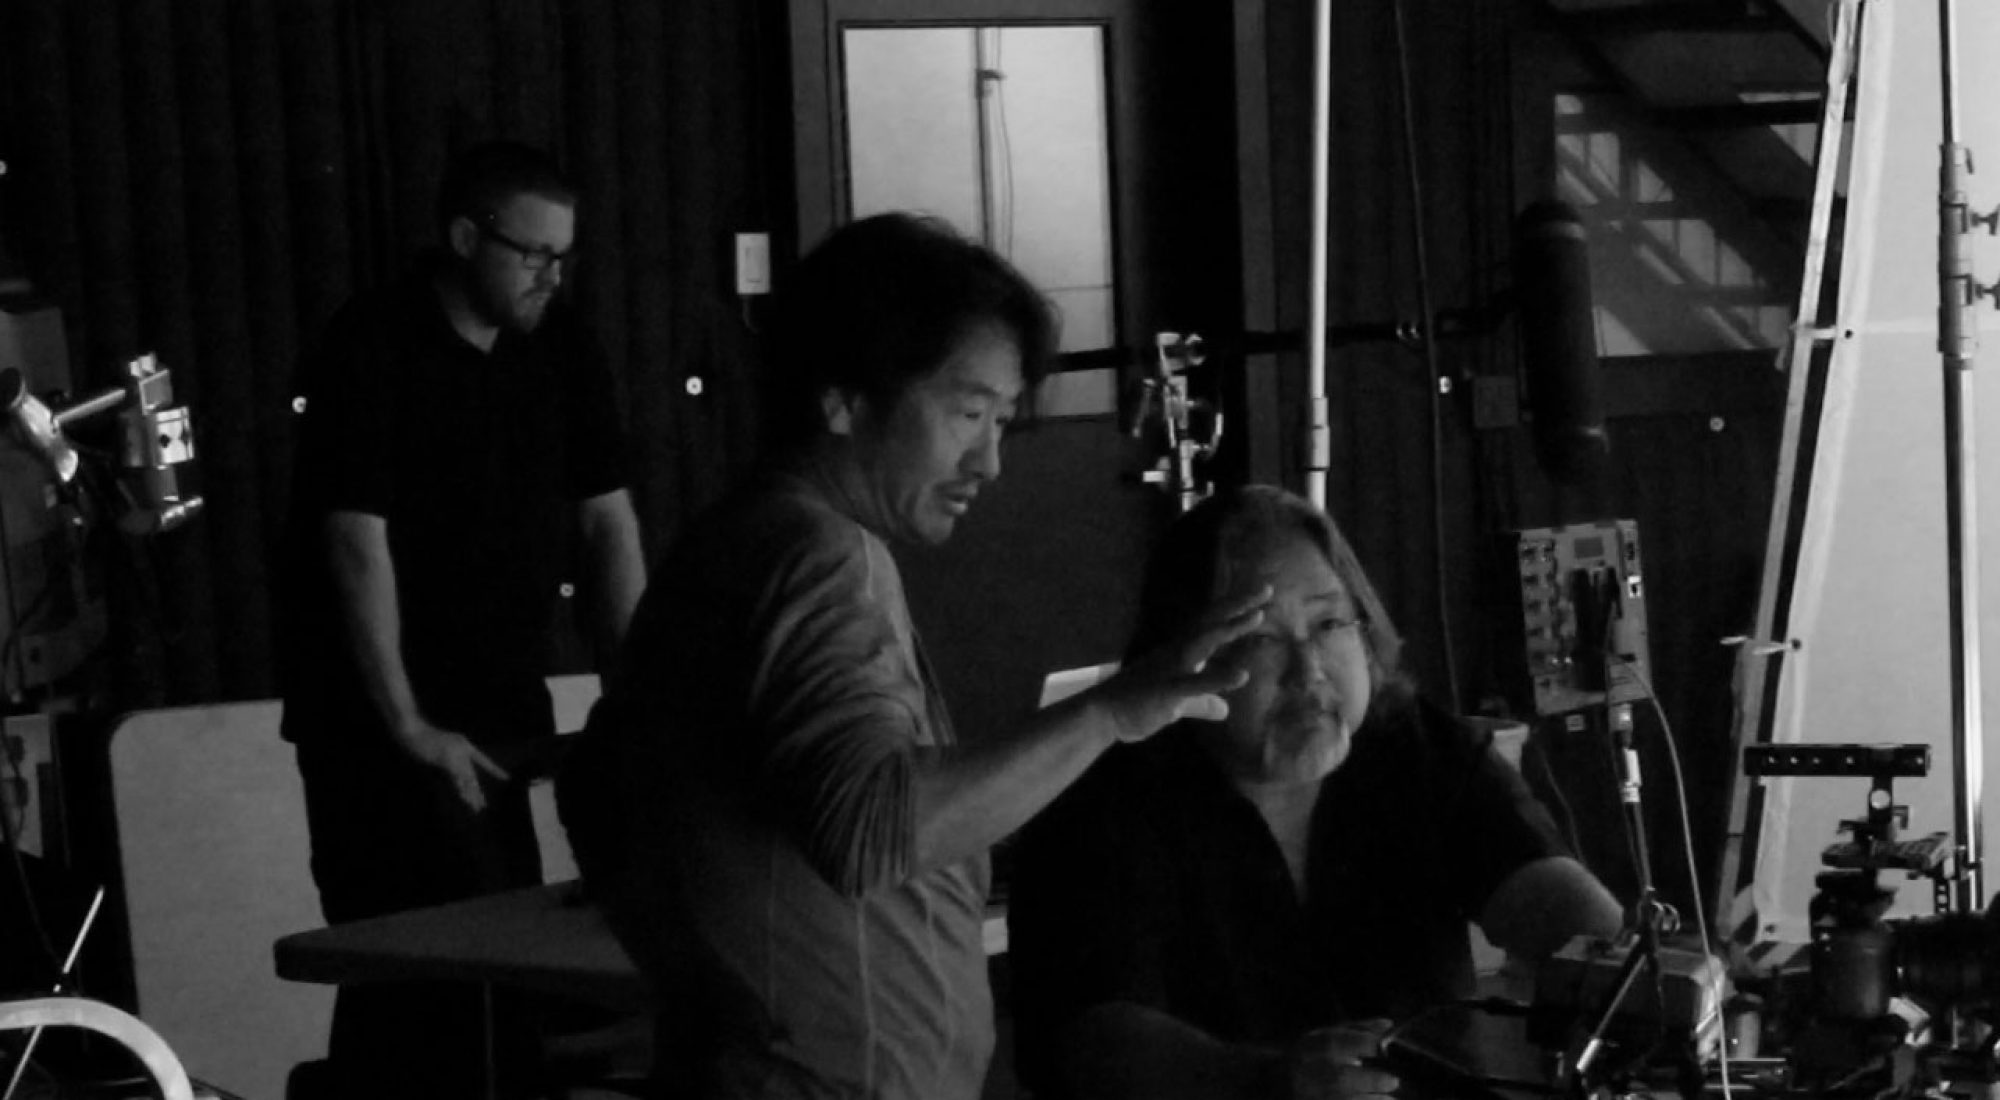
Shooting (Production)
Your script is ready, you’ve picked some locations to shoot and now it’s ready ! But you have to do a few more steps. When you start shooting, you must feel that you never have enough time. So many things to do at once.
1. Decide what resolution you’ll finish with.
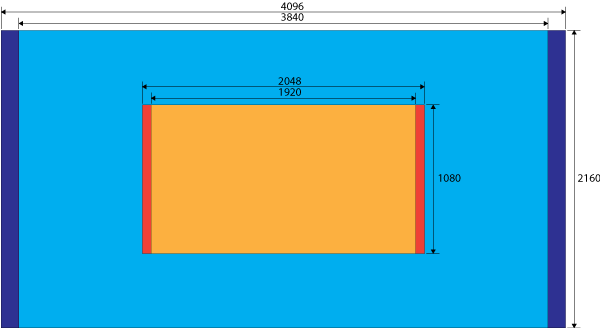
When you pick a video camera, check the cameras resolution options such as 4K=UHD, 2K=HD, many of the latest smartphones come with 4K. Here are the most common resolutions (16×9 standard ratio)
4K = 4096 x 2160 or UHD = 3840 x 2160
2K = 2048 x 1080 or HD = 1920 x 1080
Resolution table
One option that I recommend is shooting in 4K or UHD (4096/3840 x 2160) and editing and published as HD (1920×1080). Here is why.
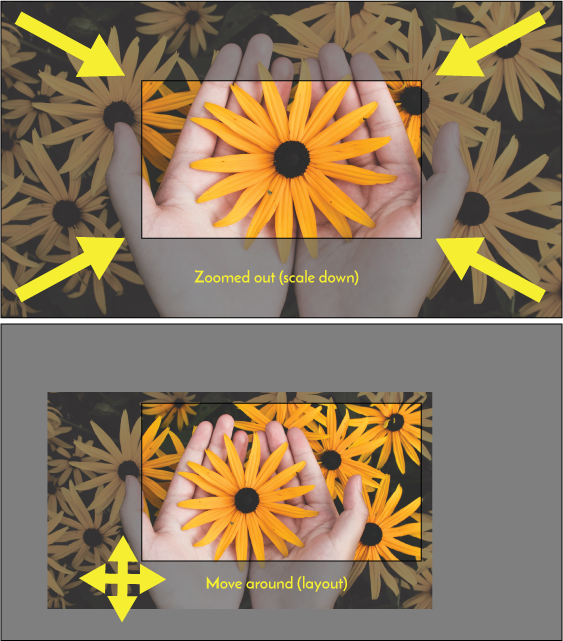
This is because you don’t spend too much time to frame the subject within the limited shooting time, so you can decide composition of the subject later at the editing. When you place a 4K footage in HD frame, you’ll see that it become as a very tight shot. You can zoom out (scale down) up to 1/4 and move around freely to find the perfect placement without losing any quality because you’ve shot in 4K. If you shoot and edit the same size, you cannot scale down (it makes some black border), if you want to scale up, it’s better to enlarge maximum 120%, if you go over 120% the image gets noticeably blurrier.
It’s true that 4K is replacing HD but I recommend (or at least you have opotions) to choose HD for the many advantages above. HD will still be common for a while, and a lot of viewers watch your video through a mobile phone, tablet (small screen) or PC (HD is still common).
(The professional shoot 6~8K and edit 4K, because of the freedom of framing, shooting speed and other benefits)
I recommend to shoot in 4K and edit in HD
2. Make a shooting plan.
You need at least 2 assistants. One for the camera and audio support and one for the lighting, so you can focus on the directing. Having assistance can save a lot of time and reduce your frustration.
AVOID windy days if you shoot outside, it gives you a hard time for the sound and for controlling the lights.
You will need a good tripod to stabilize the camera. Prepare for each camera if you use multiple camera ($10~ each). Try NOT to handhold camera to shoot, you can add some motion effects to the image later at the editing but very hard to stabilize the image. If you want to move a camera (dolly), you can use a skateboard and place the camera with tripod on it and move the skateboard slowly. You can also ask to borrow a shopping cart from a nearby super market. If you still want to handhold camera, get a grip with build-in stabilizer.
You will need A microphone (with a long cord or wireless : $20~). It’s nice to place the mic at the actor’s chest area especially shooting outside. For indoor shoot, hang it from celling just above the actor, make sure the mic is OUT of the frame.
Use A big white paper (legal or bigger) to write the script’s key points big and bold as cheatsheet. It will guide when actor speaks in front of camera.
LIGHTS: Inside shoot
Room light + 1 or 2 spot lights (LED etc.. $150~ each, LED is recommended since it’s doesn’t get hot). It’s a good idea darken the background by taking out half of the florescence lights or closing the window blinds.
LIGHTS: Outside shoot
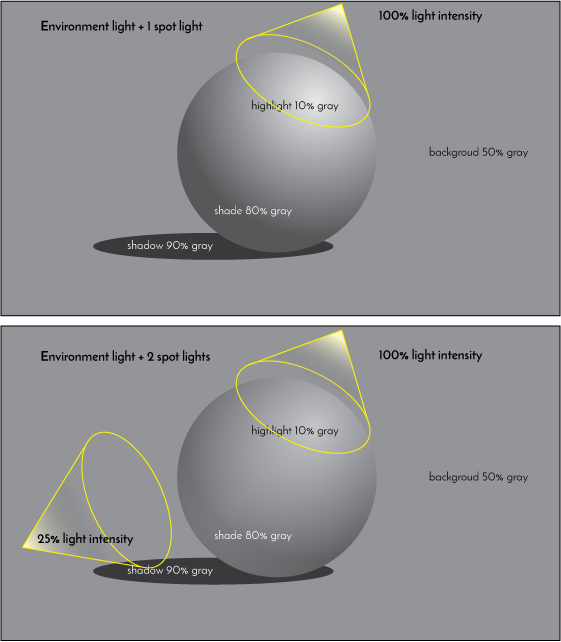
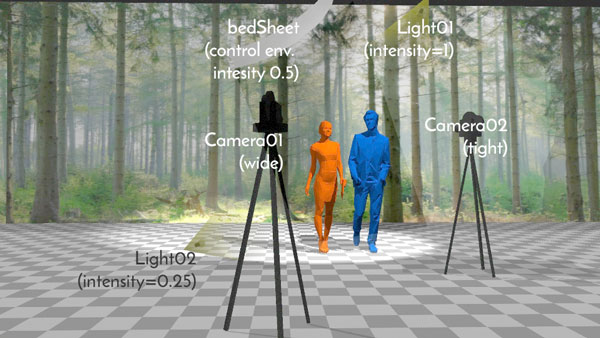
Block the sun with bed sheets to reduce the direct illumination, it’s better to avoid noon (the sun is right above) because of the shadow and it’s hard to hang the bedsheet right above the main subject. Below are 2 examples of understanding lights balance and position:
Lighting examples
Try to think as gray scale (black and white) picture in your head. Reduce the highlight spot approx. 10% so that area is not burned out (white out). also, making the background darker will emphasize the main subject. The goal of lighting is to find a good contrast and balance between subject and background, and that will bring viewers attention to the subject.
1. Shooting
LET’S ROLL!!
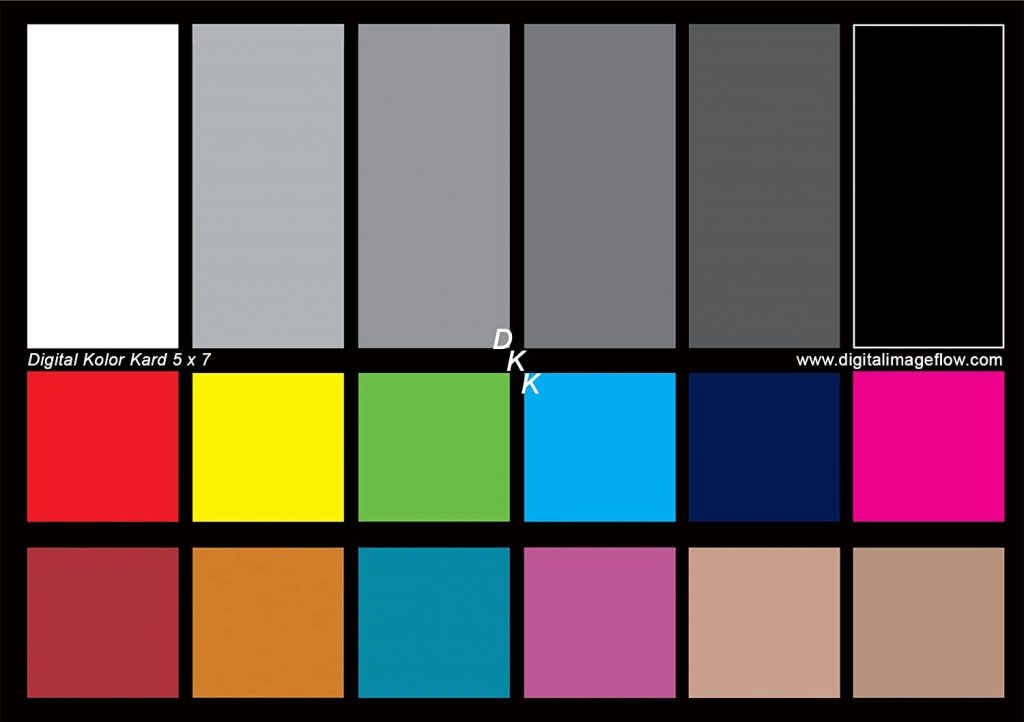
When all lights and the microphone are set and you have placed your camera, you start shooting. First YOU HAVE TO SHOOT A COLOR SCALE SHEET about 30 seconds. (You can buy one about $10 or just make 2 tones, 100% white and 100% black, print on a paper). It’s so useful for the color correction at the post.
2 (or multiple) camera
For the camera, I’ve been suggesting using 2 cameras. Here is why. You can place one for the wide angle shot and the other one for the close-up(tight), so you can shoot 1 action with 2 cameras at the same time (Multi-camera shot. Just make sure that the close up camera in front doesn’t appear inside of the frame of the wide shot camera.) When you edit you can go wide/tight shots back and forth to make the scene more attractive easily. This method ONLY works if the actor is not talking to the camera (The actor’s eyes away from camera all the time).s
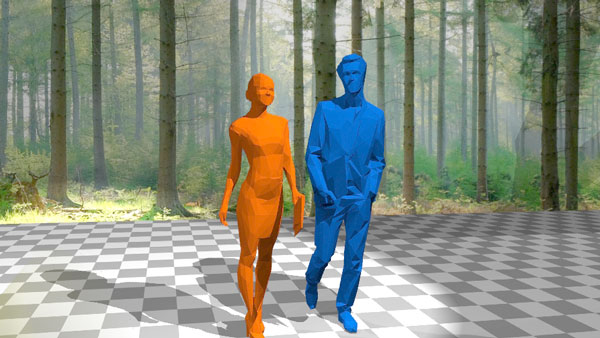
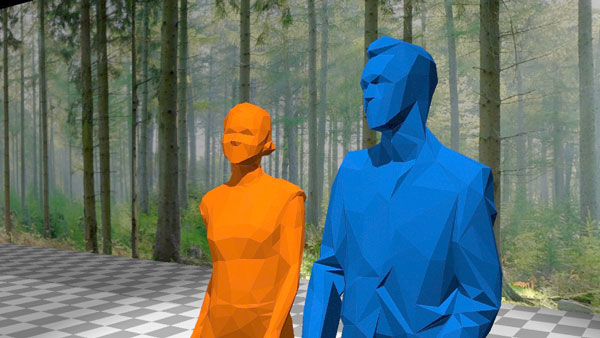
Set exampleCamera 01 (wide) Make sure NO OBJECTS such as the tight camera and bed sheet are not in the frameCamera 02 (tight = close-up)
Lock AE/AF (auto exposure and auto focus)
YYour camera usually has AE and AF function but to shoot a better quality image, both need to be locked and set manually. If your camera is equipped with shutter speed control, it’s nice to use the function as well for depth of field (blurred background) or motion blur effect.
If you use an iPhone, you push and hold to Lock AE/AF and swipe up/down to adjust the brightness after the locking. For smartphone cameras, there are many interesting apps to control functions available through the AppStore. Check and find what is the best for your purpose.
Monitor the sound
Always keep listing to what you are recording. If you have additional support, it’s a good idea to use a long light stick and place a microphone just above the actor. Try to find a silent environment to minimize the environment noise. Also don’t forget to record the environment sound for about 1 minute before you move your camera to next scene (it’s called a ROOM TONE). Having the environment sounds are really handy when you edit.
B Roll
When you are done shooting the subject, shoot some B-Rolls (close up of actor’s hand, background, some small objects etc.. to add some accent shots to the scene) using the same lighting. This footage will add some emotion, width and depth and help build video presence and drama.
DON’T RUSH! Try to plan the first day for camera/audio test and rehearsal.
2. Work with actor(s)
As a director, you have to give some direction to actors (including yourself if you act). Important things are:
Making sure the actor understands the purpose of every line.
Guide the actor what kind of emotion to put into the lines.
If speaking speed is appropriate, not too fast, sounds clear? (often non-professional actor speaks too fast)
Making sure the camera is rolling (both image and sound is recording) then you say “action!”.
STOPif you feel something is not right, find out why. Sometimes you have to change the script on the set, track the changes for the editing.
Today’s LIST OF TOOLS
– Video camera: 1 or 2 +
– Tripods: = Number of camera (option=Grip with build-in stabilizer)
– Microphone (number of actors shot at once)
– Lights : 1 or 2 +
– Bed sheet: 1~2
– Color chart (or print out of black/white)
– large white paper: write some keywords for actor
Of course!! If you need a professional consultation or production, Pleasecontact me anytime!!
I’ll give you more detailed advice for your successful production.
from koo design studio newsletter – vol. 37(J) 04/06/2021
MAKING A VIDEO LIKE A PRO!
Hello from koo design studio, I hope you are doing well. The COVID-19 vaccine is available now in US and others, hoping you’ve got it or will get it soon and it’ll work and end it. But it’s not over yet, please keep the safe practices.
Some of you might think to make your product/service promotion video by yourself. It’s good idea and fun so let’s do it. In this newsletter shares some professional tips for you. I hope that will help you to understand the production process and you succeed in your video production.
This is a series of 4 process tips:
Planning (pre-production)[THIS MONTH]
Shooting (production)
Editing (post-production)
Analysis (publish to YouTube and analyze the viewer)
Planning (Pre-production)
I think difference between a professional production and do-it-yourself prodcution is simply the scale, It means more viewer you are expected, the budget goes higher up and more people involved. But the process itself is pretty much the same.
And if you run a small business, I suggest try it all by yourself (or a small team of under 5 people). Nowadays, many things around you are available for free or for a just little fee to create high quality videos like a pro. – For example :
a video camara, you have a smart phone, if you can get 2 of them, that’s perfect!
an old white sleeping bed sheet, it’s good for controlling the sun light for lighting when shooting at outside
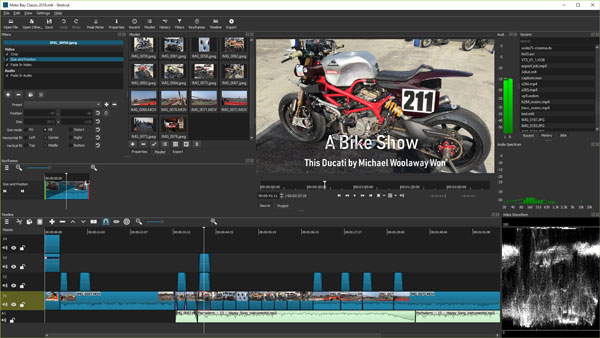
a free video editing software such as iMovie for Mac user(Free!), or download one. Those are pretty easy to use even it’s free
I’ll list up some of good-to-have tools and how to use them later.
“Planning” is the MOST important part of project success.
As same as other things, a good plan brings you a good result. Start with making a blueprint of the project.
1. Scripting (blueprint)
First, you need a script.
You know what you’re selling and have explained it to people millions of times, but you still need a script to make a video.
Akira Kurosawa said “If you can’t write a script, you can’t be a movie director. No matter how busy you are, you can write at least one page a day, and about 300 pages a year.” That is true, but I know how HARD it is!! So how do you develop a good script?
Make it super simple, shorter as possible.
List up a 3 ~ 5 words, to describe features of your product/service, what makes standing out from others, the uniqueness like “Affordable”, “Easy to use”, “Easy to access” etc…
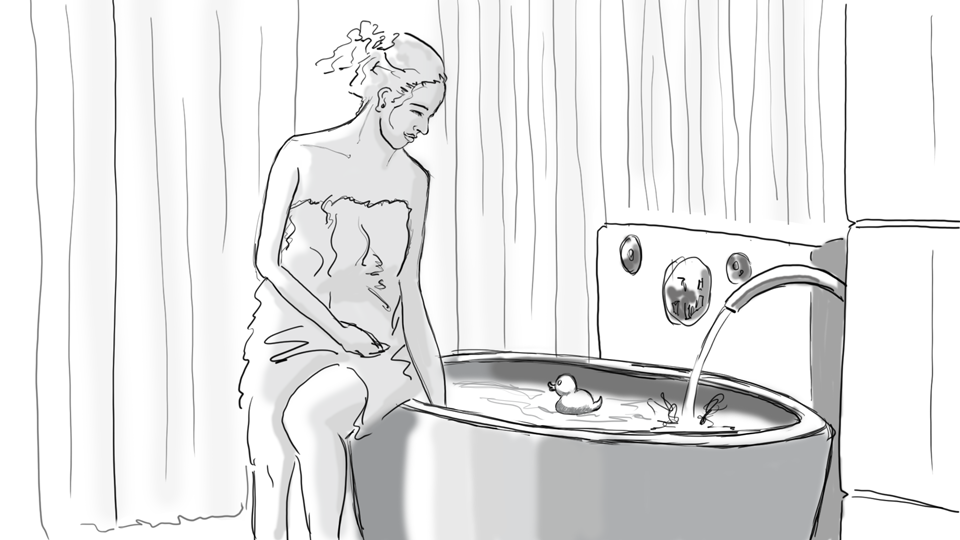
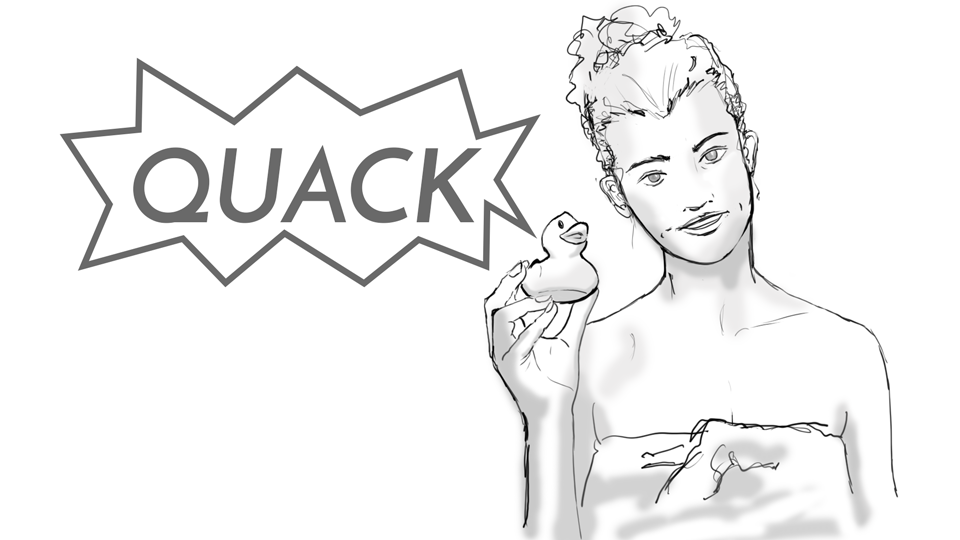
Imagine when actually your client/user use to it.
Focus on how to SHOW a lifestyle “WITH it” (it can be “WITHOUT it”), try NOT TO EXPLAIN it.
2. Actor
While writing the script, you also have to think about who plays the role. You can do it by yourself too. and/or you can ask your co-worker/employee etc… or simply you can hire an actor(doesn’t have to be a pro).
Max. 3 actors the most, 2 is better, 1 (can be yourself) is the best!!
When the script draft is done, you need to read the script aloud until you memorize it perfectly! Then ask your co-worker or friend to listen, that way you can speak better in front of camera later. It’s called “Script reading”.
3. Rehearsal
Rehearsal is usually take place in a meeting room, can be anywhere, it means it doesn’t need to be where you shoot.
Shoot all the rehearsal until you are happy with it.
Check the footages and make changes to the script/acting or both Repeat over and over it to complete the script..
Today’s LIST OF TOOLS
– Scripting: A pen and paper. You can use a computer software too (such as MS Word etc).
– Rehearsing: Camera, A smartphone.
– A tripod or something to hold the smartphone still.
Of course!! If you need a professional consultation or production, Pleasecontact me anytime!!
I’ll give you more detailed advice for your successful production.
This blog is about productions process, something I want to share with you things I’ve noticed through developing a content such as video, animation and web development.
WordPress installation
I’ve installed WordPress in to my digitalocean.com server.
ENVIRONMENT
Ubuntu 18.04.4
PHP7.2
MySQL 14.14
NGINX 1.14.0
I had a hard time configure nginx to enable php. The reason was simply the PHP-FPM location. So when you configure, please make sure the path
location ~ \.php$ {
                fastcgi_pass unix:/var/run/php/php7.2-fpm.sock;
                fastcgi_param SCRIPT_FILENAME $document_root$fastcgi_script_name;
                include fastcgi_params;
                include fastcgi.conf;
                }